How to play SOCOM II Online
Table of Contents
- Things you'll need
- Network Setup
- Downloading the Update
- Installing DLC Maps on PCSX2
- Frequently Asked Questions
Things you'll need
- [PS2] One-time patch needed for downloading the R0004 Update. [DOWNLOAD]
[PCSX2] Pnach file for bypassing DNAS authentication. [DOWNLOAD]
Downloading the R0004 Update.
PS2
A one-time patch is needed in order to bypass the DNAS authentication on the base version of SOCOM II. Unfortunately this is unavoidable at this time.
If you have not downloaded it from the link at the top of this guide, it can be found HERE
- Put the ELF file on your PS2's flash drive if you are on a console and boot it via FreeMcBoot.
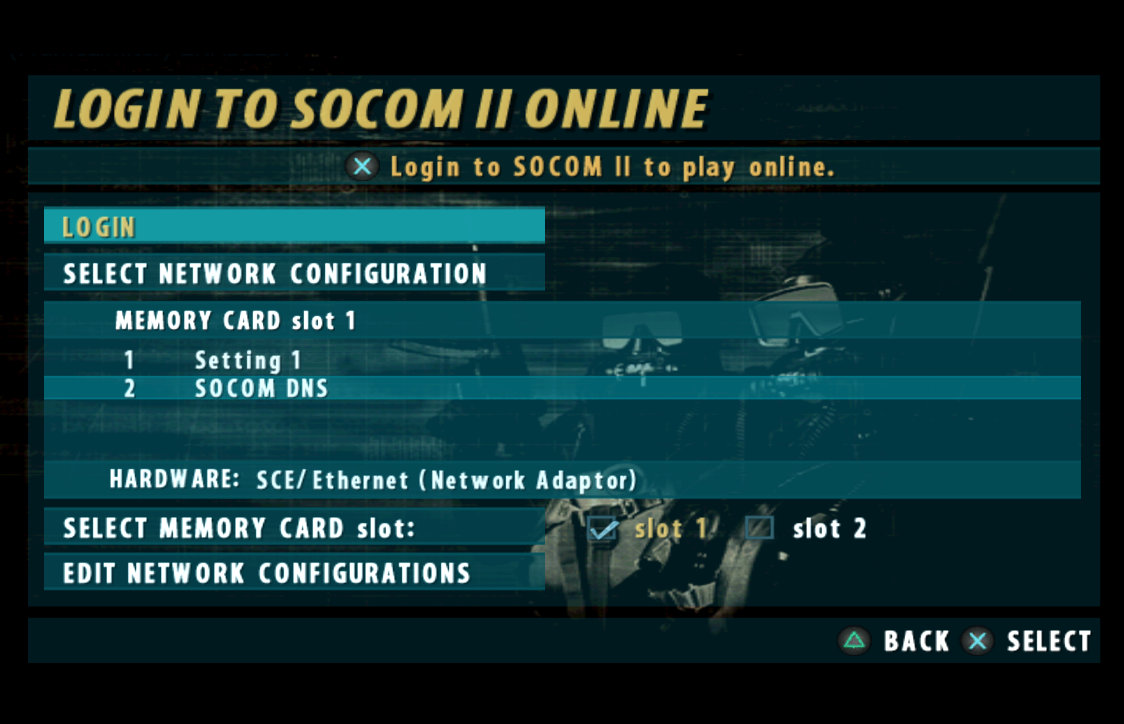
- Once the game has loaded, select "Online" and connect.
The bottom of the main menu will still say "SOCOM 2 r0001" at this point!
PCSX2
If you are using PCSX2, you will need to use the pnach file that was mentioned at the top of the guide.
If you have not downloaded it from the link at the top of the guide, it can be found HERE
Make sure to put the pnach file in the cheats folder of PCSX2.To enable the cheats in PCSX2, right click the game in the game list and click properties.
In the properties window go to Cheats and click the checkbox to enable cheats and make sure DNAS Bypass R0001 - r0004 is checked.

Once you start the game you will notice that the version for socom will say "r0001" at the bottom of the main menu.
This is normal and once you go online and download the update it will change to "r0004".
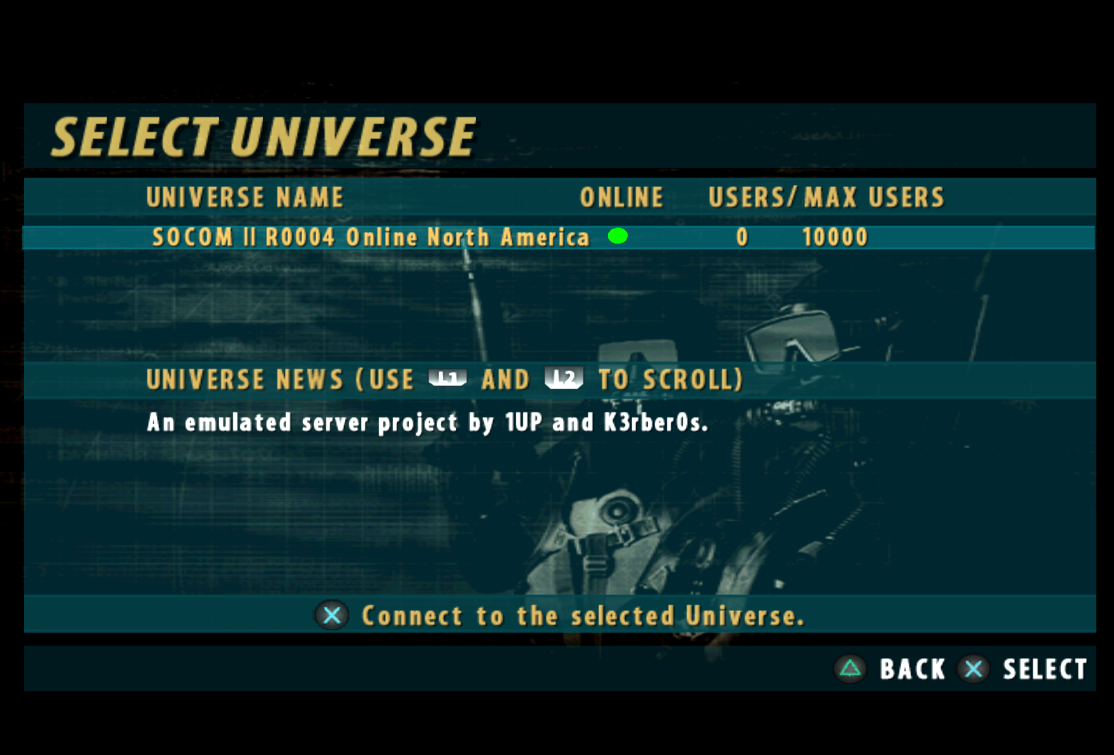
- After a successful connection, click on the shown universe.
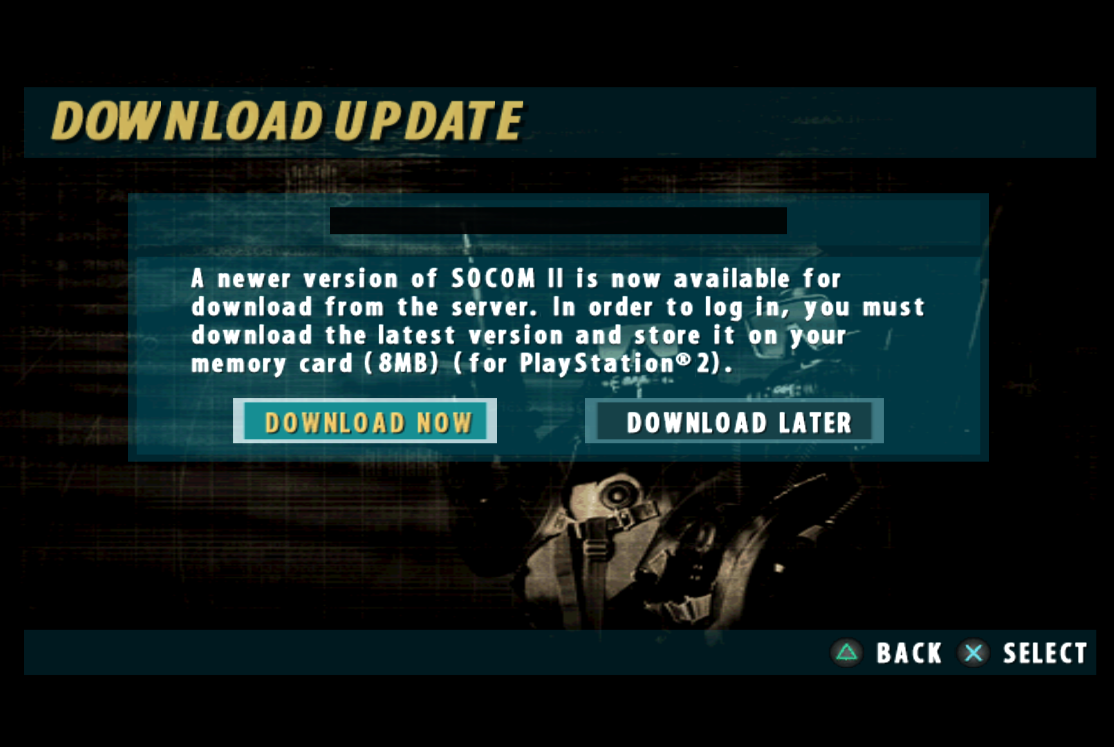
- Download the update when prompted to.
**The download can take a few minutes. Please be patient.
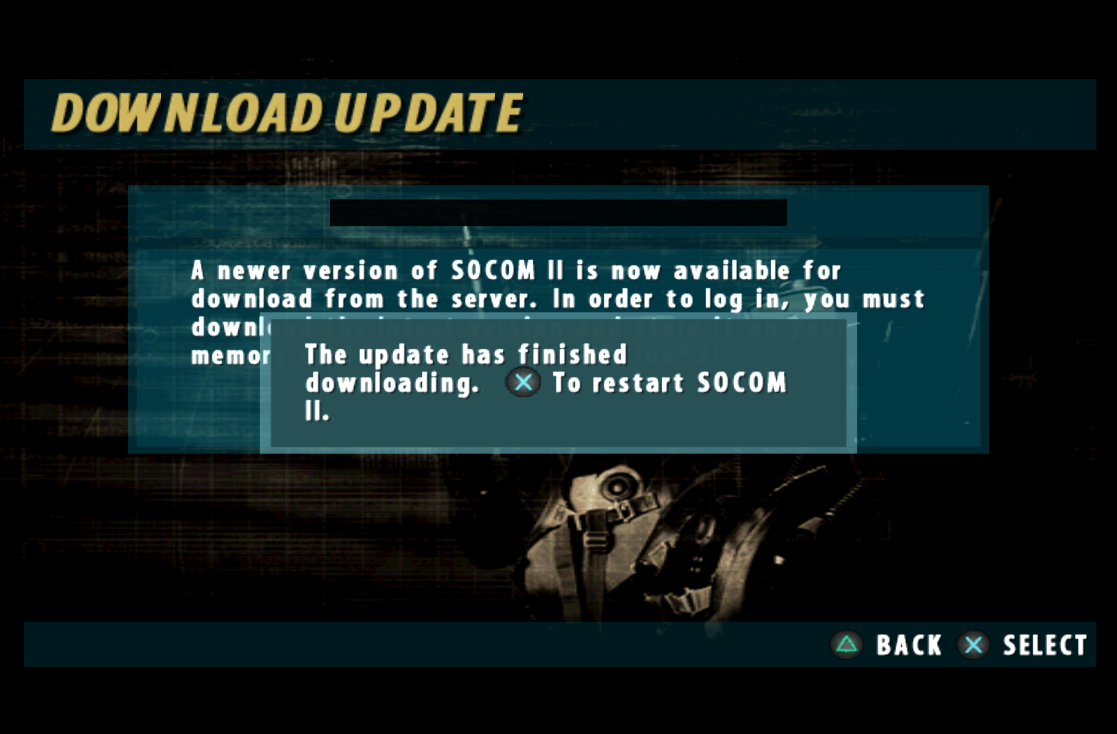
[PS2]Once the update has downloaded, save it to your memory card and restart your console manually.
**If you attempt to let the game restart on its own, it will freeze. This is expected.**
Installing DLC Maps on PCSX2
SOCOM II r0004 contains support for 3 additional maps for online play via the HDD. PCSX2 with CLR_DEV9 contain support for loading these maps from an HDD disk image.
The HDD image file needed can be downloaded [HERE]
Setting up the PCSX2 HDD
Download the file above and extract it to your PCSX2 directory.

You will now need to configure the Network & HDD settings in PCSX2
- Open PCSX2 and at the top menu click Settings and then click Network & HDD.
- Under the Hard Disk Drive section, click the Enabled checkbox.
- Click on the Browse button and select the HDD image placed into your pcsx2 folder earlier.
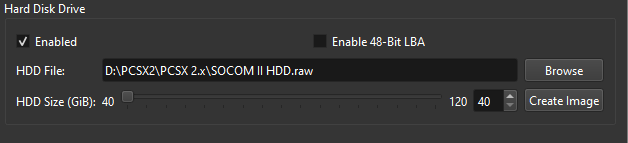
Click close once you are done.
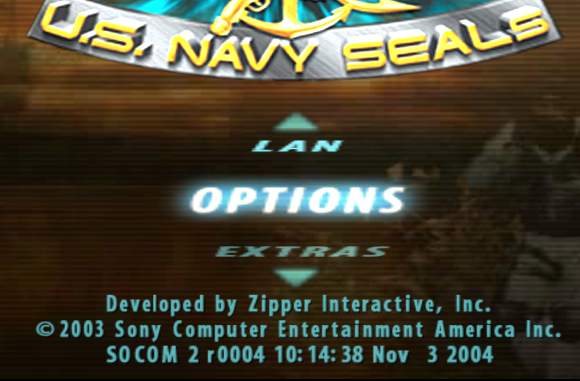
Enabling the HDD for SOCOM II
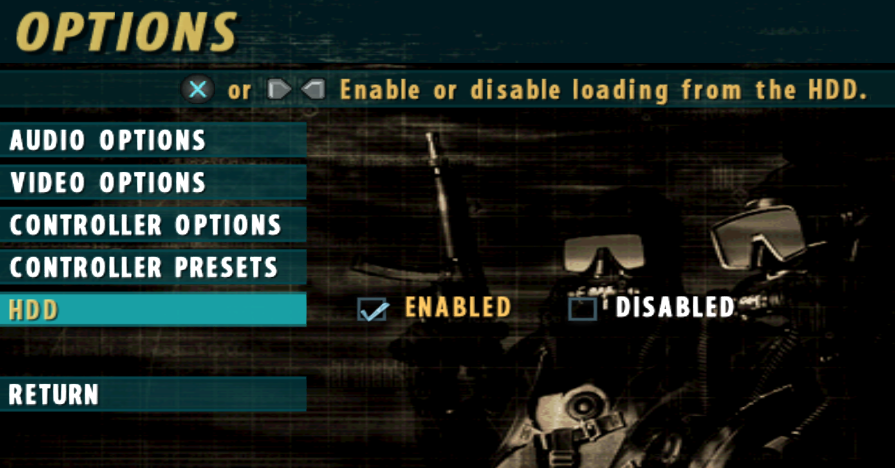
At the main menu of the game, select "Options"
Enable "HDD" option in settings, and return to main menu.
Save to your memory card when prompted.
You are now ready to use the Online DLC!
FAQ
I've done everything in this guide and I still get stuck at the "Looking for Universes" screen
Some ISPs block DNS updates. Unfortunately there is not much we can do about that and it may be worth contacting your ISP for more information.
If all else fails, a secondary patch is available that bypasses the DNS requirement and can be downloaded [HERE]
When setting up the DEV9 plugin, I do not have an option for WinPcap
There are 2 causes for this.
- You just installed WinPcap and have not rebooted your PC.
- Your network card does not support WinPcap, and you may need to use Winsock instead.
When I boot the patch for the first time my game still says r0001!
You didn't read the guide close enough. The patch only gives you the ability to download the update from our server. You need to go online in order to download the update.
Some maps are really slow and laggy for me on the emulator... What's the deal?
Luckily, thanks to Harry62, a fix is available for this. Simply go online and anywhere in chat type "/rfix on" and this will save to your account and apply the render-fix automatically every time you log in.